In this tutorial we will take a look at how you can add a planned absence for a child via the Management System.
Please be aware that only Managers can add absences (by logging in via a browser).
If you are using invoices on Tapestry any absences you add will not be discounted from the invoices you generate.
First, you’ll need to locate the Management System from the menu on the left. Next, select Children and then click on the child you wish to add an absence for. This will take you to the child’s dashboard.
Adding a planned absence
Once you’ve located the relevant child and have navigated to their dashboard, you’ll need to select the tab titled Extras & Absences. Then, to add an absence choose the +New drop-down menu and select Absence.
Configuring the absence
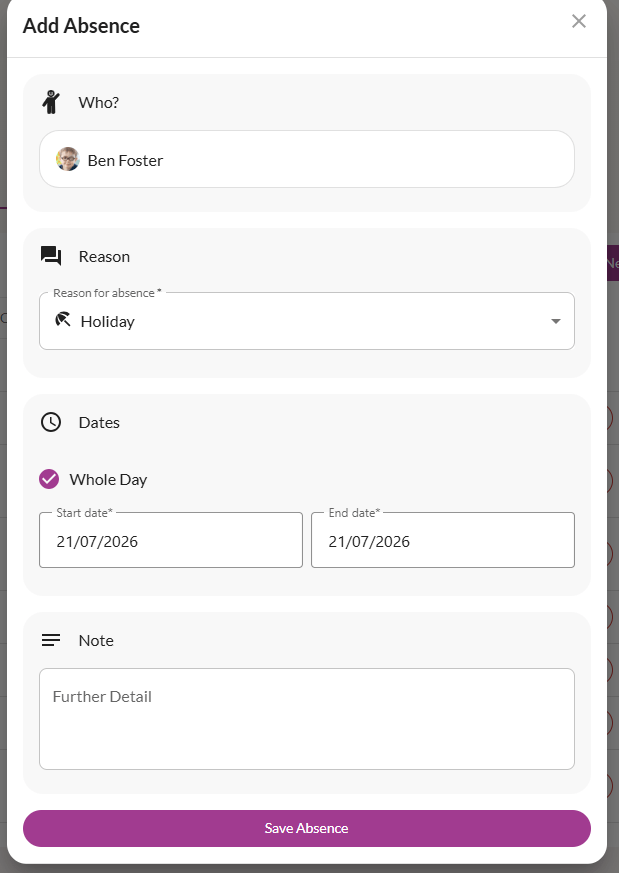
The next step is to select a Reason for the absence, and add the relevant Dates. If the absence is for less than a whole day, you can untick the ‘Whole day’ option and set specific hours. If required, you can also add further details in the Note section.
Once you’re happy with this, select Save Absence. The absence will now appear in the Child Register on the relevant dates.
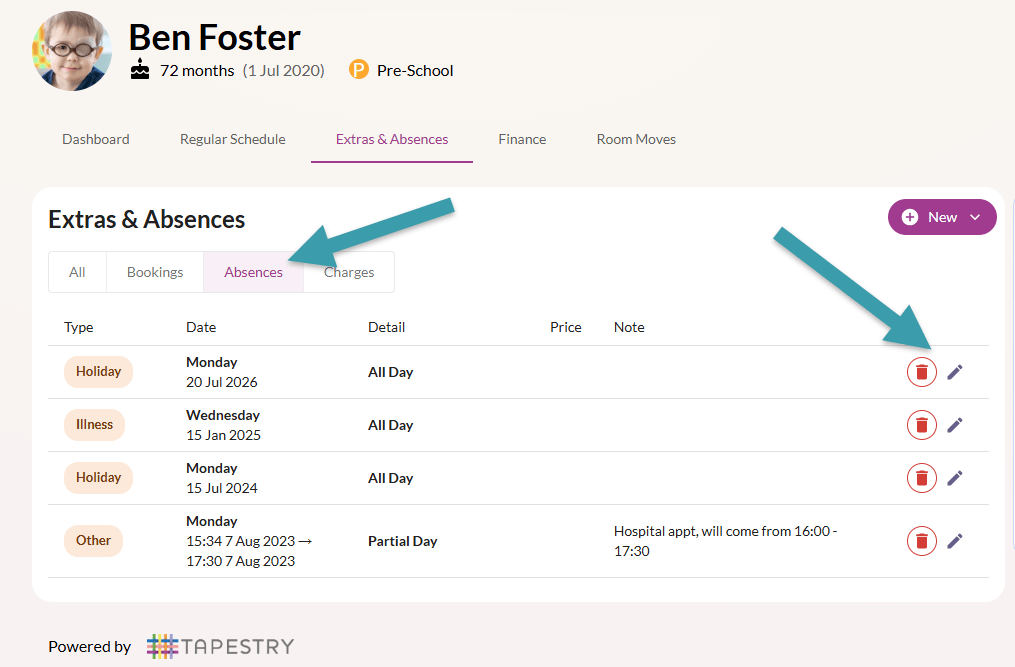
Once saved, the absence will appear under the Absences tab on the Extras & Absences screen. From here you can edit and delete the absence if required.
The absence will also appear in the child’s calendar on their Dashboard. Here you can easily view the duration of the absence and the reason.
And that’s that! You can now add a planned absence for a child on Tapestry. Next, you may want to take a look at our tutorial on Adding Extra Bookings and Charges.