
Welcome to Tapestry! Let’s get your new account setup and ready to go.
We’ve created some easy set up screens to help you pick the best options for your school or setting, and tailor it to suit your needs. This tutorial will guide you through each screen, and give you some tips and tricks along the way.
Feel free to use the Table of Contents on the left hand side of this screen to navigate to a specific section, or read on to start from the beginning.
Filling in your login details
Before you reach the main setup screens, you will first need to choose your password and log into Tapestry. You can do this by clicking the link in the activation email you will have received when you first purchased Tapestry.
Activation emails are sent to the email address that was used to purchase the Tapestry account. That email address will be associated with the first manager on the account, and will also be where invoices are sent.
You can change the email where invoices are sent at any time by logging into your FSF account, or contacting the Product Support team at customer.service@eyfs.info.
Once you’ve clicked the activation link, you will be taken to a screen where you can create your Tapestry login.
Fill in the details from top to bottom, ensuring your password meets the requirements. Once you’ve submitted those details, you’ll be taken to the success screen, and you can click to log into the account.
When you’ve logged in, you will be taken to the the start of the setup screens, and you can start tailoring the account.

Who and where you are
The first three screens ask what kind of school or setting you are, and where you’re based.
Screen one asks what type of setting you are. You can select more than one type, or select ‘Other’ to manually enter your setting type if you don’t see it in the list.


You will then be asked to select whether you are a member of a chain or trust. If you are not, keep the ‘No’ box selected; this is the default. If ‘Yes’, tick this box and enter the name of your chain or trust.
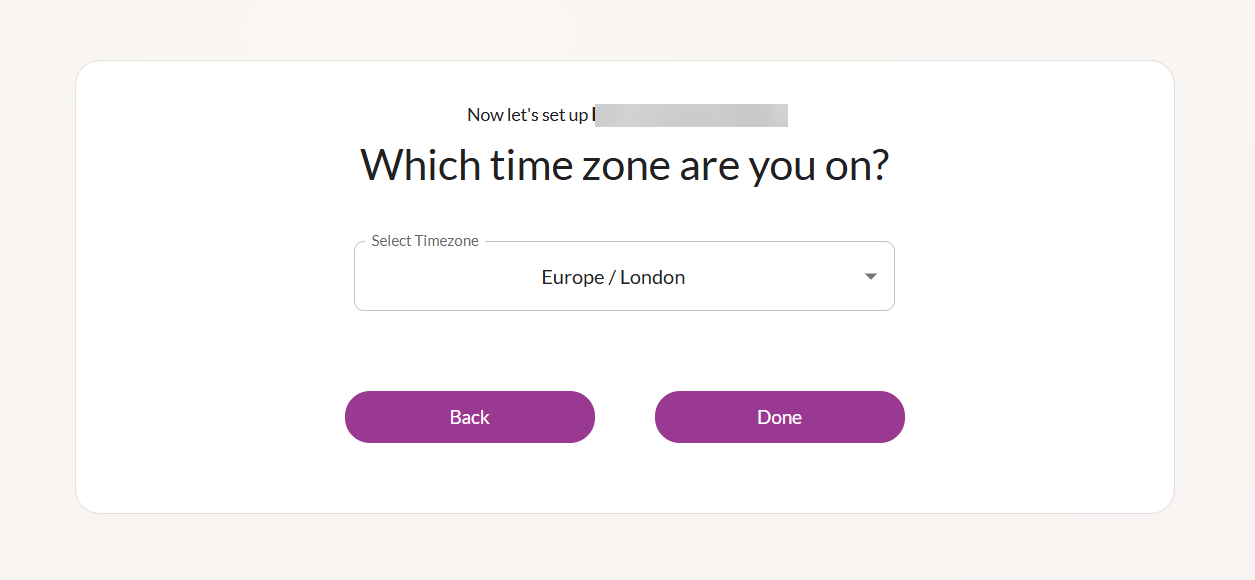
Lastly, you will be asked to select your time zone; you can use the dropdown on this page to select the one that’s right for you.
Adding another manager
Once you’ve completed the first few screens, you will be taken into Tapestry itself. Here you can finish adding your information and enabling features useful to your setting.
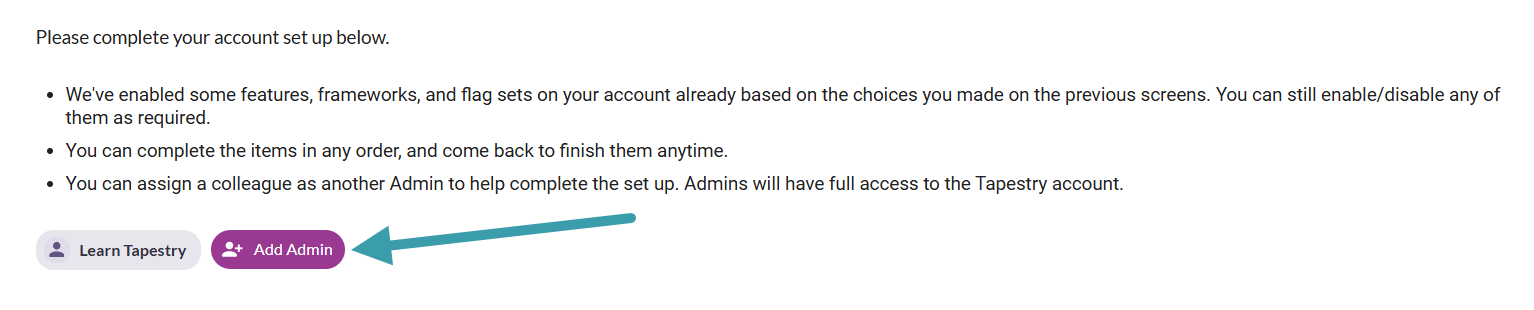
You can also add another manager to Tapestry if you like; you can do this by clicking the ‘Add Admin’ button, filling in their details and sending them an invitation.
We recommend having at least two managers on a Tapestry account, if possible.
Not only can Managers configure Tapestry accounts, but they can confirm requests made to our Product Support team, which is important should you ever need to recover your account.
Navigating the Setup page
Throughout the rest of this page you will be guided through the final steps to set up your Tapestry account. As you progress through this screen, you will see your steps tracked through the progress bar in the top right.
A tick will appear next to any completed sections. For some of the screens, you will see the tick automatically appear after you have clicked through into the screen and come back to the ticklist, even if you haven’t added any information or changed any of the settings. You can always come back to these areas at a later time and amend them if you need to.

There are some sections which you will be able to skip such as adding Staff members, Groups and classes and Relatives. This is because this information may not be something you are ready to add just yet. Clicking Skip will tick off these sections automatically.
Click into any of the sections to start adding your account’s information. When you are ready to return to the Setup screen, you can click the Back to your setup list button. You can also get back there by clicking Setup in the navigation menu, or Let’s finish setting up your Tapestry account in the announcements section.

You will find that some information is pre-filled for you, based on the answers you gave in the first three screens. For example if you told Tapestry you were a Montessori setting, Tapestry will have enabled the Montessori framework, as well as the Care Diary and Booking features.
You can check or amend these by clicking into the relevant sections on the Setup screen, or in the Configuration menu.
Finishing your setup
When you have finished setting up all the areas in the list, you will see your progress bar is complete, and will see a confirmation message at the top of the page.
At the bottom of the page will be a message summarising the setup of your account, and you will have the option to save your changes and continue; this will take you to the Observations page.
Please note, after this point you will no longer be able to come back to the setup screen. However, you can change any of the details you have submitted by going to the Configuration and Settings menus.
You’re all done! Now that you’ve set up your account, why not have a go at adding your first observation, or fill in the About Me sections for the children on your account?